This is my first ever tutorial.
I'm sorry in advance and I'm sure someday I'll look back and cringe at this post.
*Man am I having 4-H public presentation flashbacks!*
I started with:
- a very large sheer window panel
- fabric glue (FYI: The "Ok to Sew" brand is not my favorite because it dries with a slight blue cast)
- 2 spools of 7/8" wide black grosgrain ribbon
- 1 spool of 7/8" wide antique white grosgrain ribbon
- 2 yards solid black cotton
- duct tape
- 2 cardboard boxes
- a curtain rod with a very deep arch (bend? pocket? whatever you call it).
The first thing I did was split the panel in half and hem the raw edge. Then I glued the black ribbon over the seams all the way around. *Why I didn't just sew it is beyond me and next time I'll just do that because the glue took FOREVER to dry*

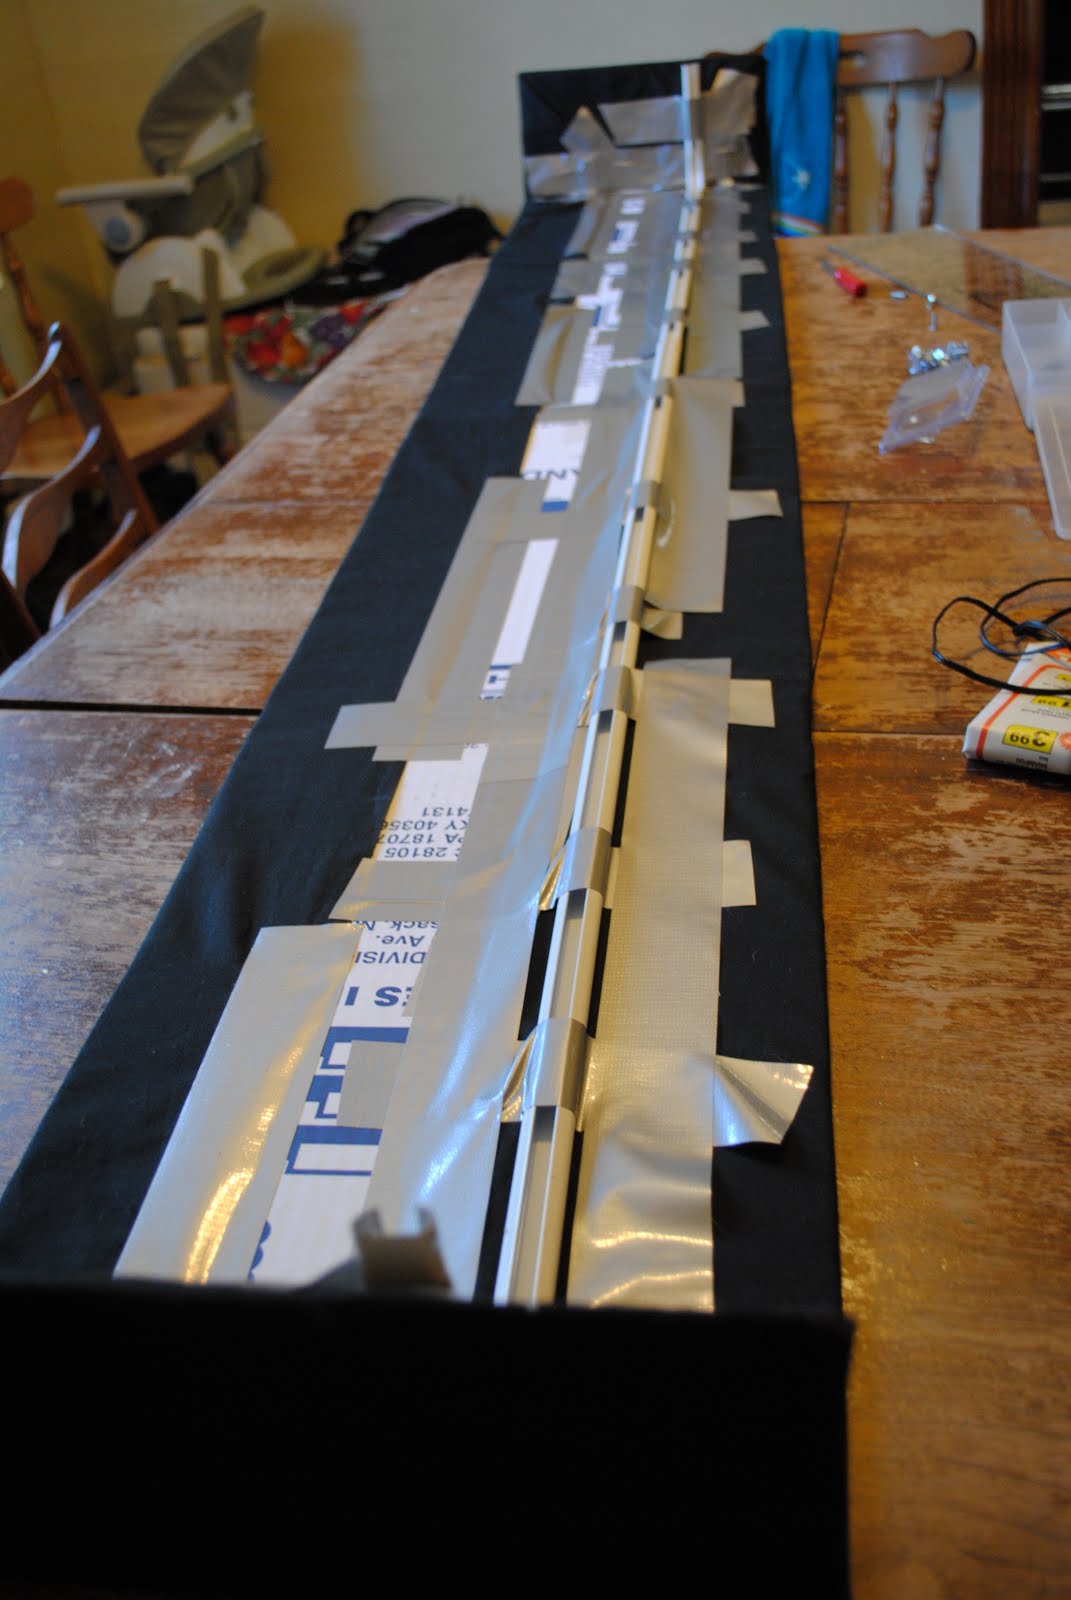
Next I split open the boxes

Since my pelmet was going to be exactly the width of the side of the box I just cut them down each fold and I cut off the top and bottom flaps on all but 2 because I wanted it to be as stiff as possible.

For this particular project it took 4 and half sides. I actually don't know the measurements of this window because I used the rod as my guide. After I measured and double checked I duct taped all of the box sides end to end leaving one flap on each end.

Then I taped my black fabric onto the cardboard trying to keep it as tight and smooth as possible.

After that I took a ruler and chalk and marked the lines for where I wanted to glue the white ribbon on. I did this because I KNEW I would never be able to keep it straight that whole distance. After I glued the white ribbon on and let it dry all night I found out that my glue was showing through even though it was dry. So to cover that up I used some black satin ribbon I had on hand and glued it on top.

Then I taped the daylights out of the back of the pelmet and the rod.
After I hung it up I realized that the corners were pulling away slightly, and although probably no one else would notice I knew it would annoy me. So I bought some corner brackets.

I ended up just taping these on too because the screws were too long and would poke through to the front.

Then I hung the whole thing up on the existing curtain rod brackets.
*Closed*

*Open*

I really, REALLY love how it turned out! And I'm starting to get a vision for what else I want to do for this room!
I'm planning to paint the walls a Terra Cotta color which will hopefully be done by Thanksgiving! I also have a lot more ideas but you'll have to wait to find those out later! :-)
*You may be wondering why I didn't just make the pelmet out of wood. The answer is. 1.) I don't have a saw, 2.) I wasn't sure I'd like it and it would be permanent, and 3.) I wanted to be able to craft it!*
Happy Friday!


